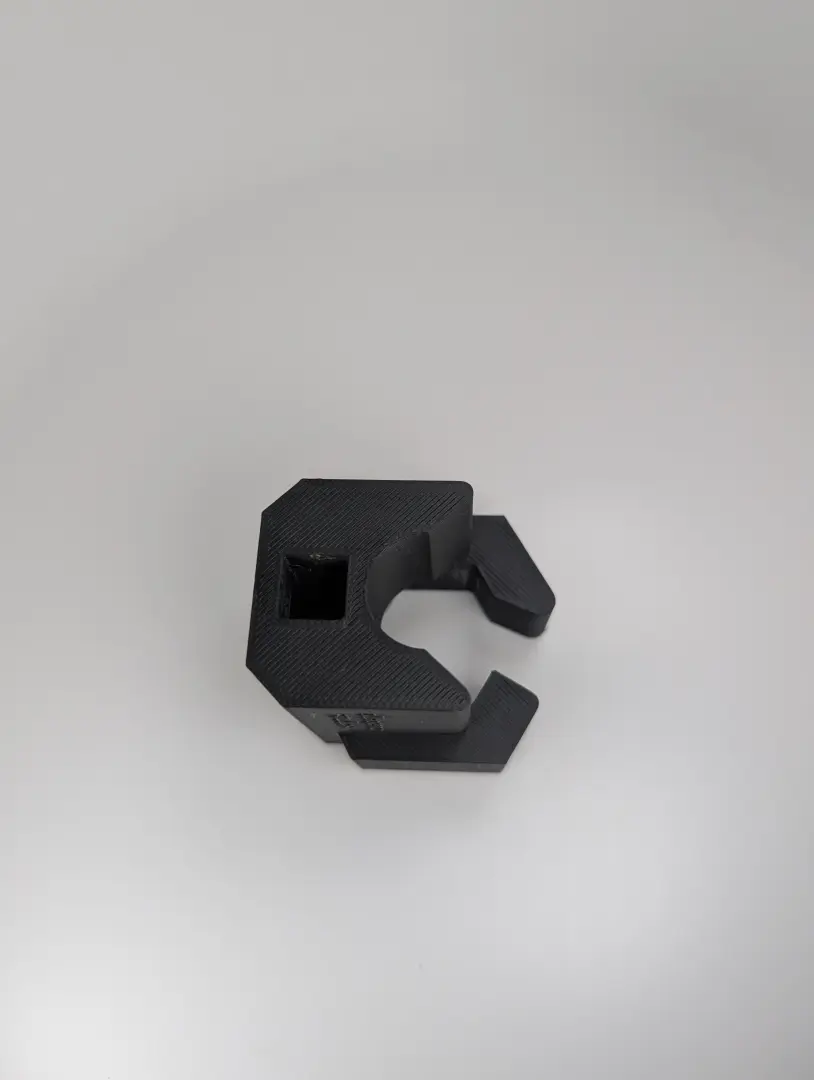
CarbSocket
-
product info
fizz more for less!!
tired of the hassle and cost of changing co2 tanks? the CarbSocket simplifies the process, allowing you to easily connect larger co2 tanks to your aarke carbonator pro. say goodbye to constant cartridge replacements and hello to effortless carbonation.
buy the new CarbSocket @alloatech studios tsy store
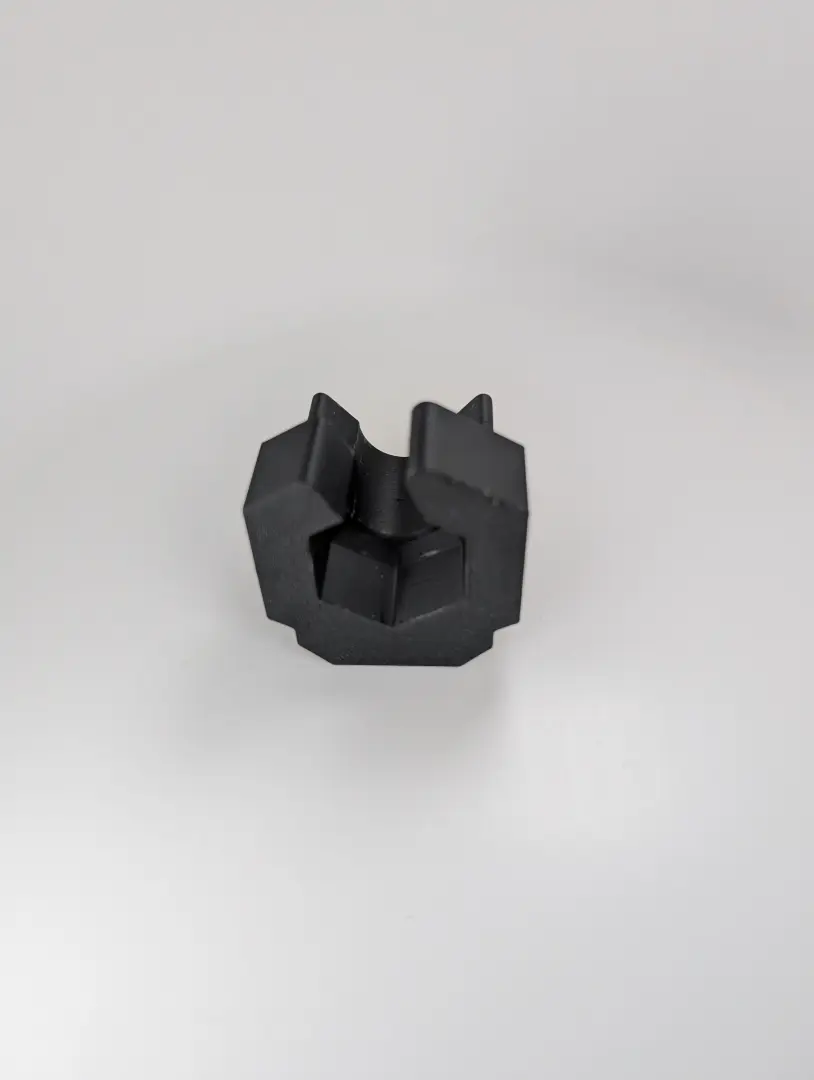
CarbSocket compatibility
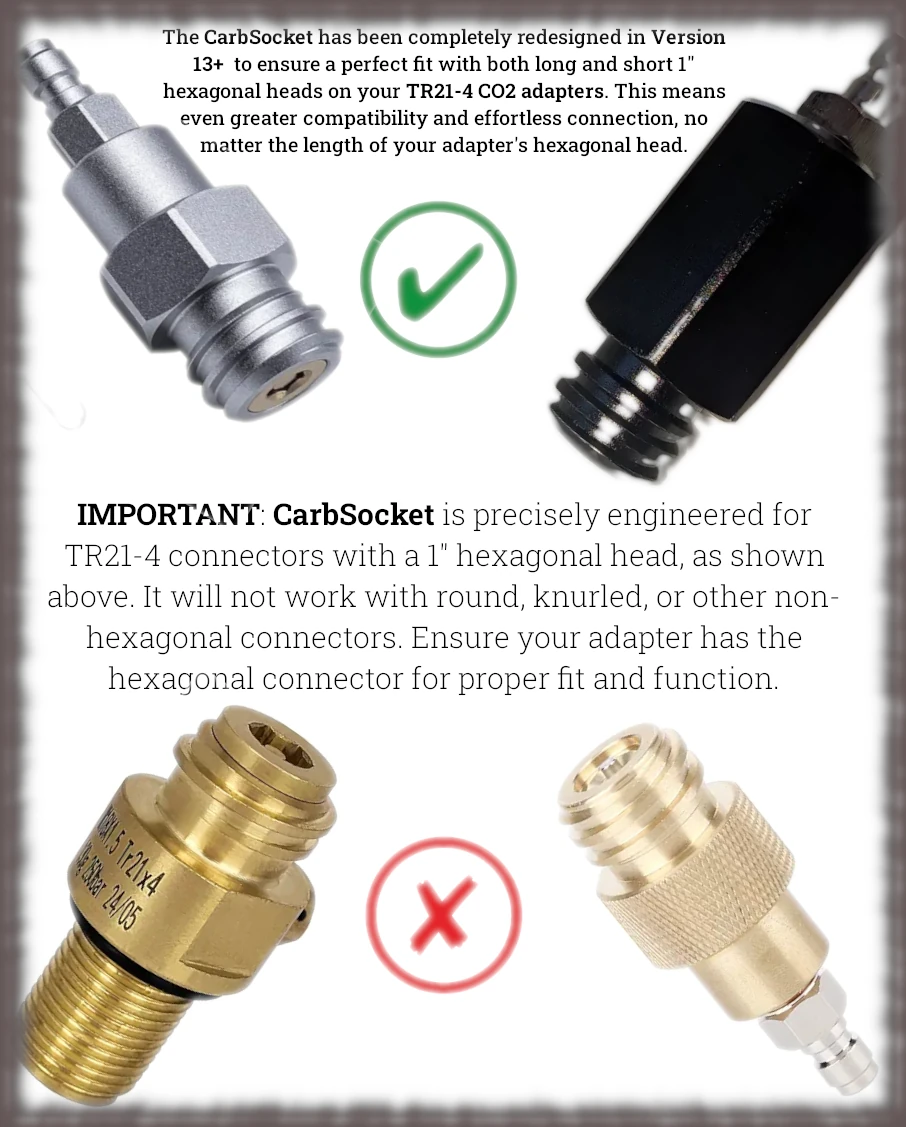
the original CarbSocket was designed for an adapter with a 1" hex shaft that was approximately 1 3/8" long. we've now found that newer adapters, like the one recommended below, no longer consistently match these specifications. since we cannot control these manufacturer changes, this has led to a situation where the CarbSocket is no longer a guaranteed fit.
there have been cases where the tr21-4 connector sometimes doesn't match the one in the picture. we ordered a new one and it did, but we can't be responsible for the manufacturer changing the connector, which seems to happen randomly. the new version of the CarbSocket is compatible with the ones shown below. please verify your connector before ordering a CarbSocket to minimize compatibility issues that are out of our control.
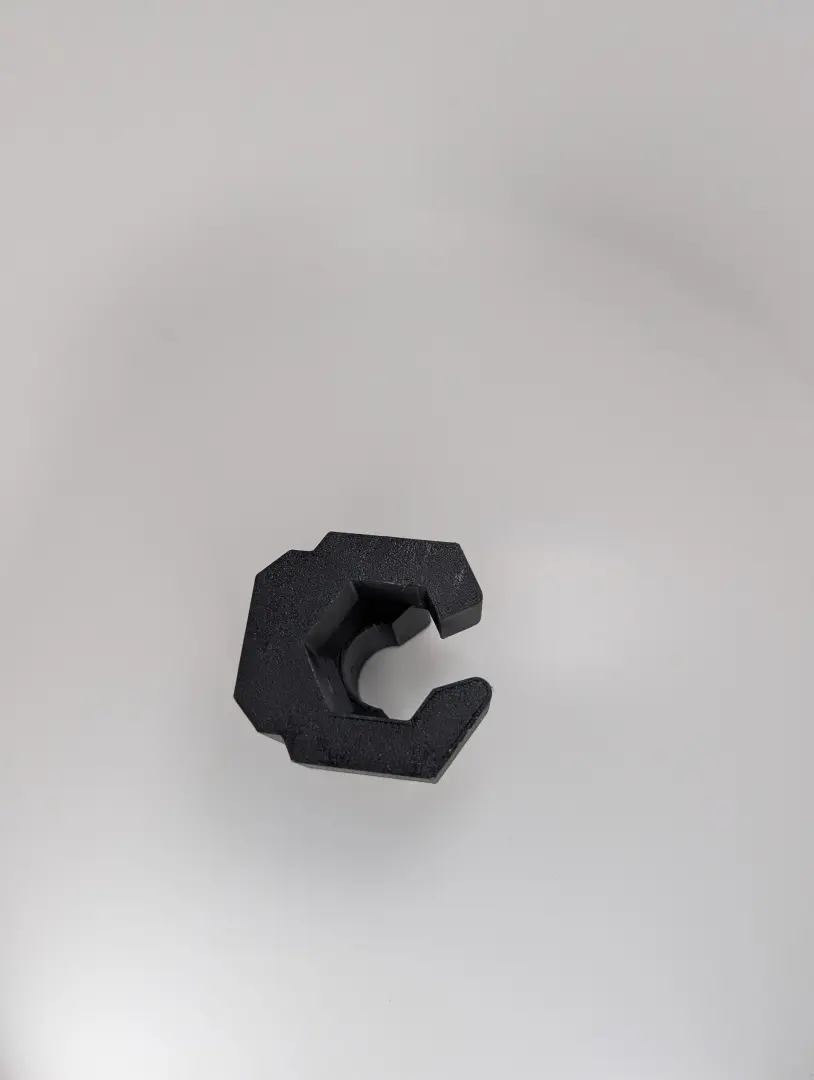
we went back to the drawing board and completely revamped the CarbSocket to meet the specifications of the two most popular connectors we've encountered. this new version, v13, not only handles these connectors perfectly but is also smaller and twice as strong as previous models. we're also proud to announce that we've been able to cut the price by 40%, making your journey to massive savings even more affordable.
however, if your hex adapter is 1" x 1 3/8" then you should be good to go to order version 12 of the CarbSocket. shoot me a note on @alloatech studios tsy store or contact us if you have questions or concerns.
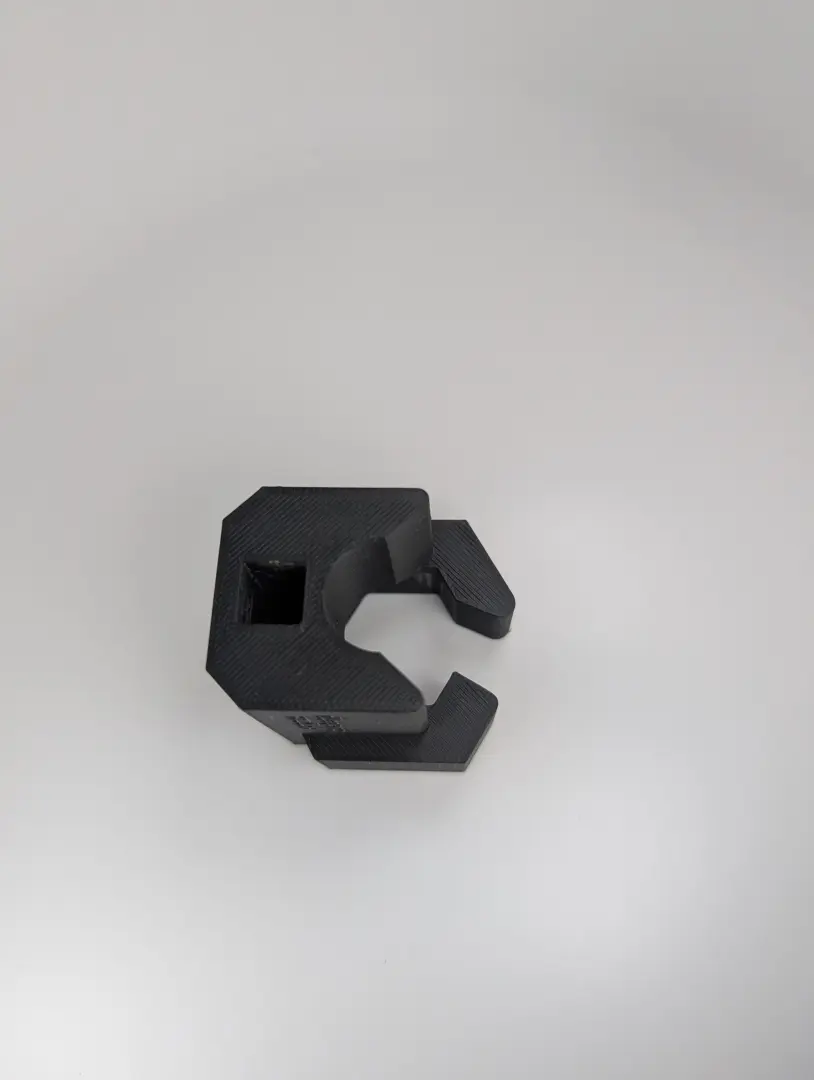
expanded compatibility: CarbSocket version 13
 we're thrilled to introduce CarbSocket version 13, bringing even greater versatility and convenience to your sparkling water setup! this latest iteration has been meticulously redesigned to support a wider array of screw-in tr21-4 co2 connectors.
we understand that connecting larger co2 tanks to your soda machine can be a bit of a labyrinth. that's why CarbSocket version 13 now confidently handles more types of tr21-4 co2 adapters, ensuring a perfect, secure fit for a broader range of hose and tank setups, regardless of your specific carbonator brand. whether you've sourced a slightly different tr21-4 variant or encountered a connector that previously didn't quite seat correctly, version 13 has been engineered to embrace those variations.
this means you can connect your favorite soda machine to your preferred larger co2 tank with even more confidence and ease – simplifying your setup and maximizing your savings!
is your soda machine compatible?
 tired of the constant hassle and expense of those tiny, frequently exchanged co2 tanks? if your current soda machine uses a screw-in co2 connector that specifically looks like the connector shown on the right.
and you're planning to use one of the larger co2 tank hose adapters mentioned below in the product list, then CarbSocket is designed for you. it will seamlessly work with your setup, allowing you to connect to bigger tanks and enjoy significant savings – regardless of the soda machine brand you own. it's about making your carbonation experience easier and more affordable.
looking for a deal?
 if you have this specific connector (or a very similar screw-in tr21-4 type) for your soda machine, and you're looking to grab a great deal, we might have just what you need! we have a small, remaining inventory of previous CarbSocket versions that still work perfectly for this particular connector style. these are the same high-quality tools, just from an earlier production run, and we're making them available at a reduced price.
to inquire about purchasing one of these previous CarbSocket versions, please send us a message directly on our tsy store or an email. simply let us know you're interested in the older version, and we'll promptly reply with a direct, private link for you to complete your purchase. act fast, as quantities are truly limited!
-
image gallery(1)
- - if you click on an image you can scroll through the gallery of all images on this page

check out the recommended product list below to see the complete list of products used for my setup
for detailed installation instructions and tips, check out the instructions section below
-
specifications (v13)

durable and reliable: made from durable PLA.
compatible with popular adapters: works with standard hex 1” TR21-4 co2 adapters check out adapters @
-
3d model
modeled with 3d parametric modeler FreeCAD
-
3d print
3d printed with bambu lab x1c bambu lab x1c
-
product list (1)
- - disclaimer: this site contains affiliate links. if you click on a link and make a purchase, i may earn a commission at no extra cost to you. i appreciate your support !!
-
CarbSocket
tired of the hassle and cost of changing tiny co2 tanks? the CarbSocket simplifies the process, allowing you to easily connect larger co2 tanks to your aarke carbonator pro.
-
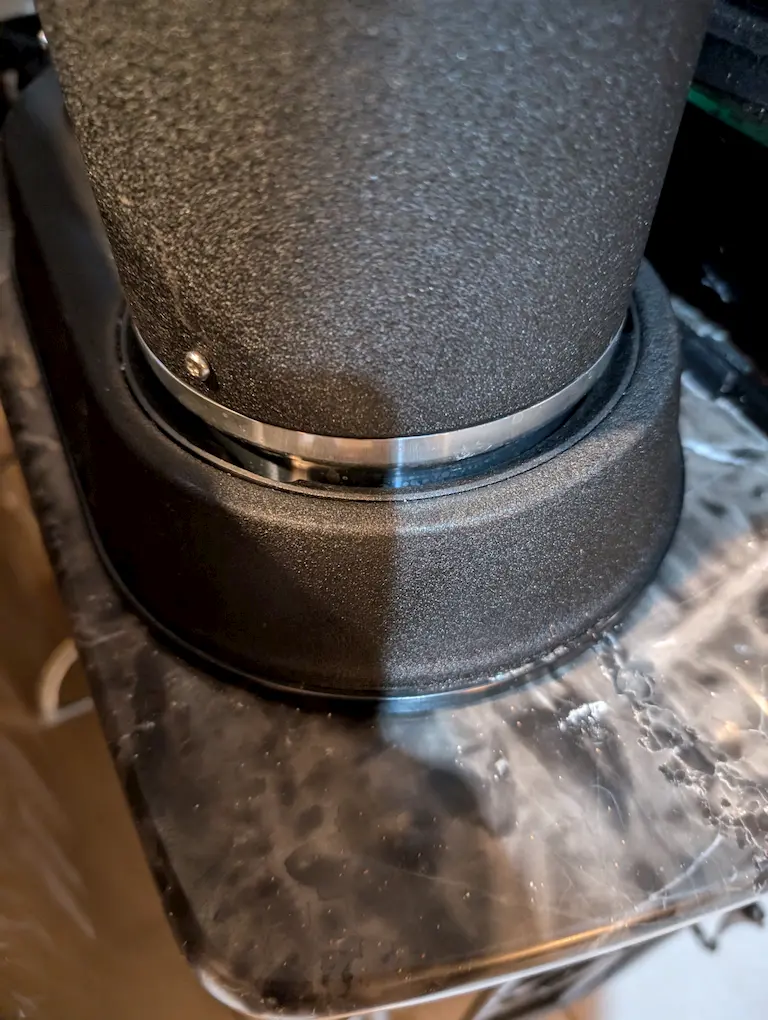
CarbLift (for aarke Pro & 3 models)
use this custom base to raise your aarke carbonator pro or carbonator 3 so you can easily feed in an external co2 hose into the carbonator from a large co2 tank and enjoy continuous, effortless carbonation.
buy the CarbLift Pro for your aarke carbonator pro @alloatech studios tsy store
buy the CarbLift 3 for your aarke carbonator 3 @alloatech studios tsy store
-
aarke carbonator pro
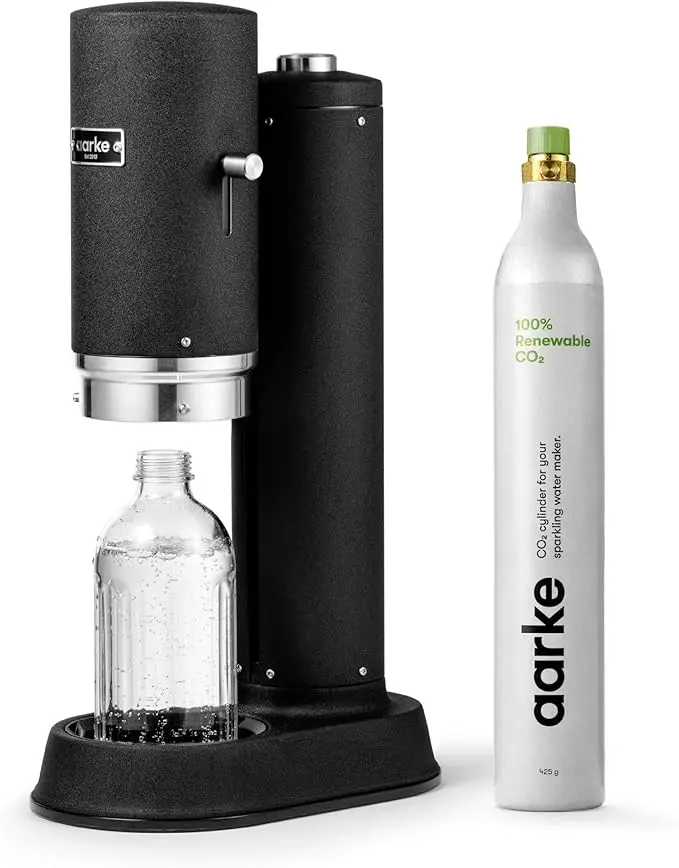
stylish, durable and reliable: after much research this is my favorite(1) carbonator on the market
- here is my setup
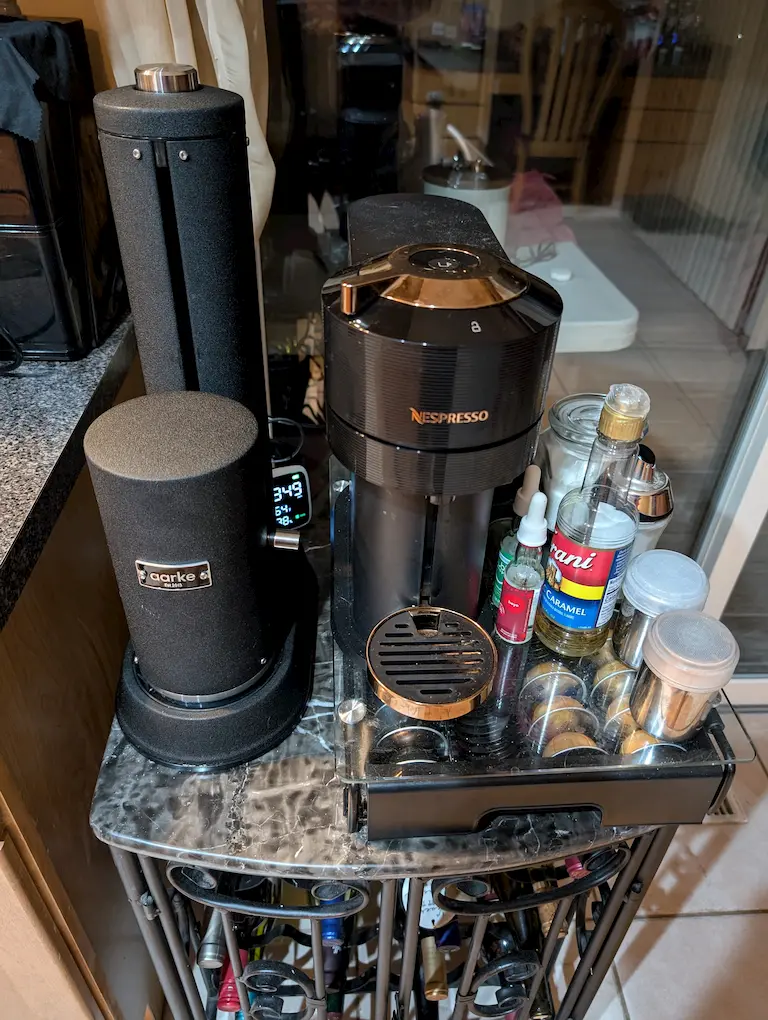
- here is my setup
-
co2 tanks
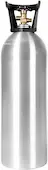
most common sizes are 5, 10 & 20lb tanks. consider your consumption rate and where you are going to store the tank. more tips(1)
-
- you need to also consider how you are going to run your co2 hose adapter from the tank to the carbonator. also consider the tank material(1), valve type(2) and local availability for refilling(3). more safety tips(4)
- typically aluminum or steel. check for DOT approved.
- look for a cga320 valve
- check out local beverage centers, home brew supply stores, i went to airgas
- store in a cool, dry place. consult a specialist for advice. handle with care.
-
-
co2 adapter hose

recent change in connector dimensions
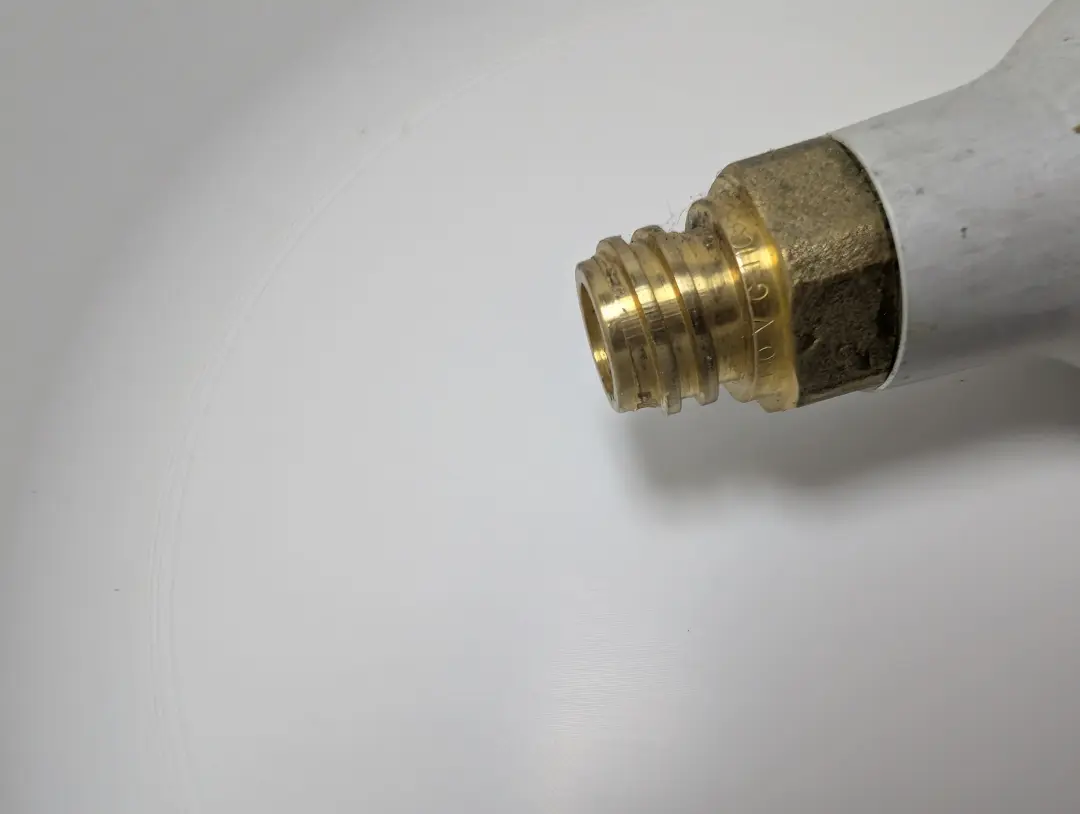
so it is really important to note that the tr21-4 adapter really refers to the threads on this connector. that part will not change because it needs to mirror the threads on the tiny co2 tanks. the carbsocket requires a specific size of the hexagon 'shaft' and was originally a 1" hex shaft and that hex shaft was approximately 1 3/8" long. it is important to note that there is no way to control when the manufacturer changes these fitting dimensions. it seemed to be constant for about a year and then all of a sudden a new set of dimensions rendered the CarbSocket useless. worse yet, since I don't keep buying these adapter hoses my customers are the first ones to find out and that just causes delays and frustration on all fronts.
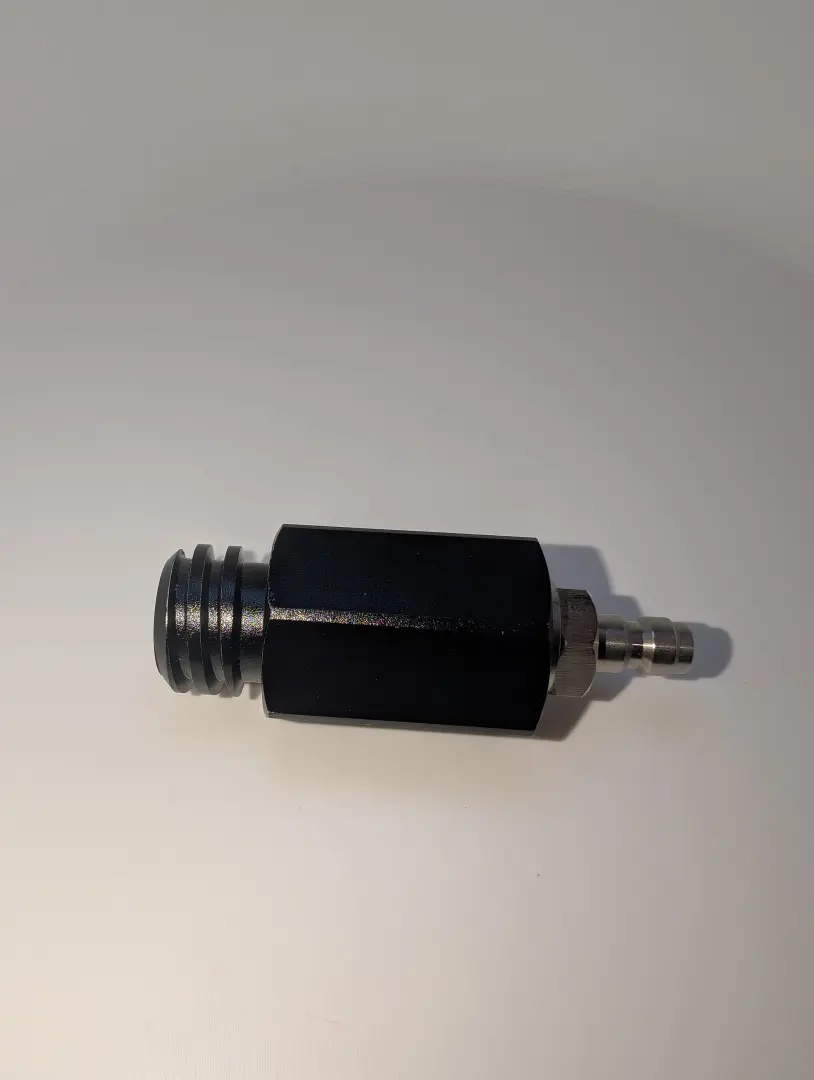
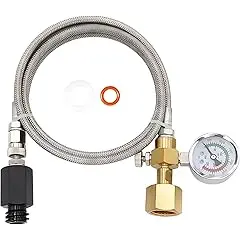
upgraded soda machine co2 adapter stainless steel hose with larger pressure gauge, cga320 co2 tank direct hose adapter and tr21-4(1) adapter
- - the CarbSocket was designed specifically for this adapter. you don't have to buy this exact hose adapter, but you'll need this standard hex 1" tr21-4 adapter on one side to fit the aarke carbonator pro and the CarbSocket
-
co2 carbon dioxide detector

indoor air quality monitor 4-in-1 portable co2 monitor, tester for carbon dioxide, temperature & relative humidity, co2 meter
-
instructions
when attaching or removing hoses, connectors, anything really
the first thing you need to do is fully close the main co2 tank valve. then do all of your work and ensure everything is snug back up tight. then when you are all done then open the co2 tank valve, test for any loose fittings and then enjoy.
don't use excessive force when using the carbsocket
please remember, the CarbSocket is plastic it will eventually break but i have tested it many, many times and can tighten the adapter to what i approximate a solid 'snug, hand tight' fit with the ratchet with no damage to the CarbSocket. this is version 11 of the CarbSocket and the first 10 didn't pass the tests. cranking down on the fitting with a ratchet may also damage the carbonator and we don't want that either. there should be a gasket in the tr21-4 so once i feel it getting snug i just give it a little bit more torque and stop.
attach the connector to the tank first
see below for additional installation instructions and tips
-
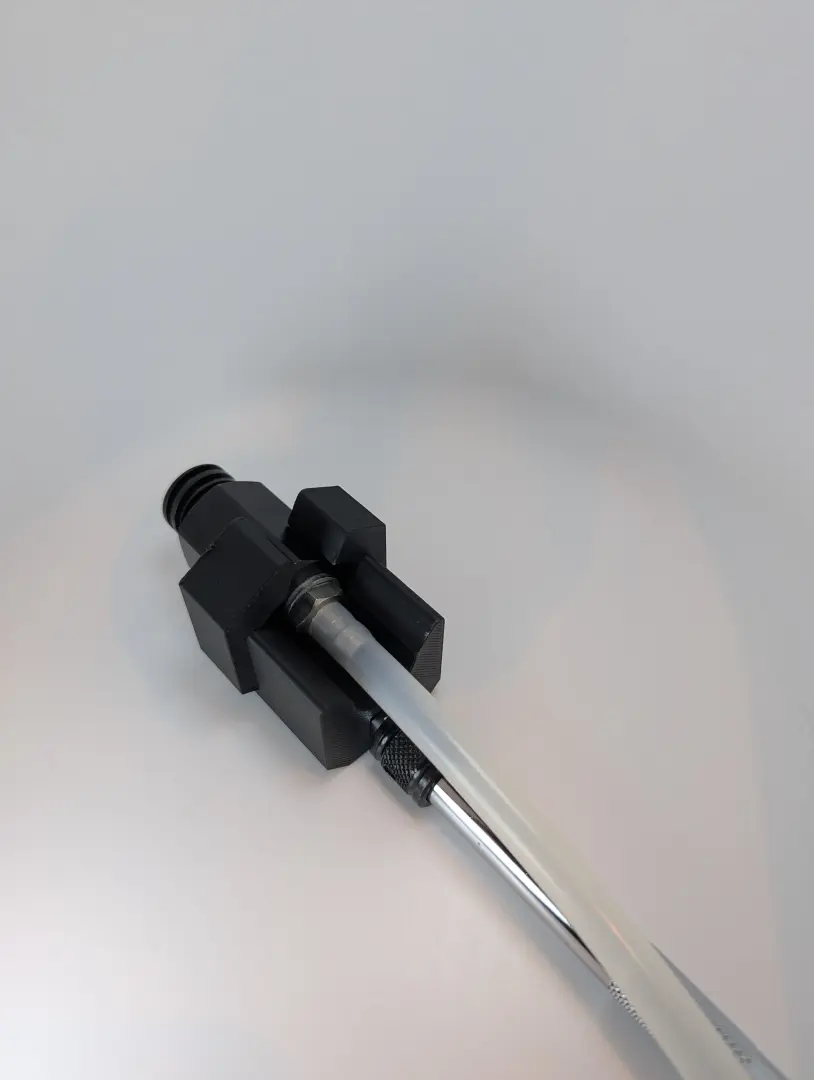
assemble the tools
connect the ratchet to the socket extension and then attach the carbsocket to the extension.
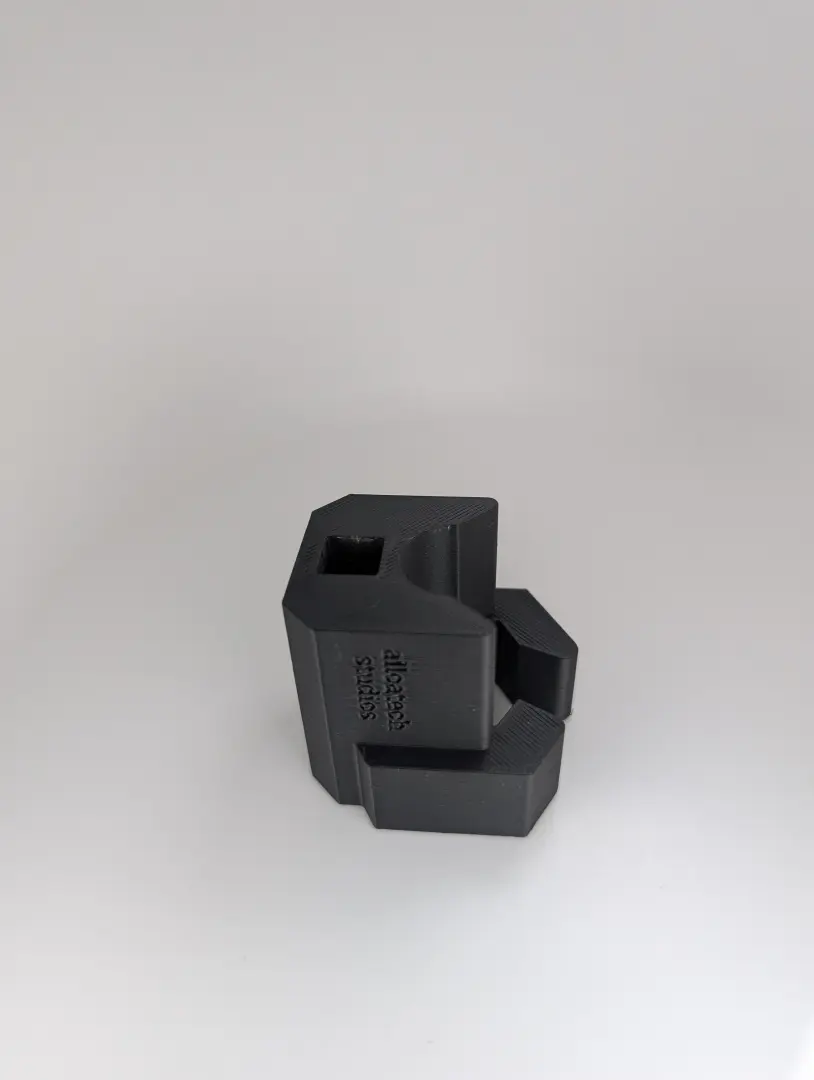
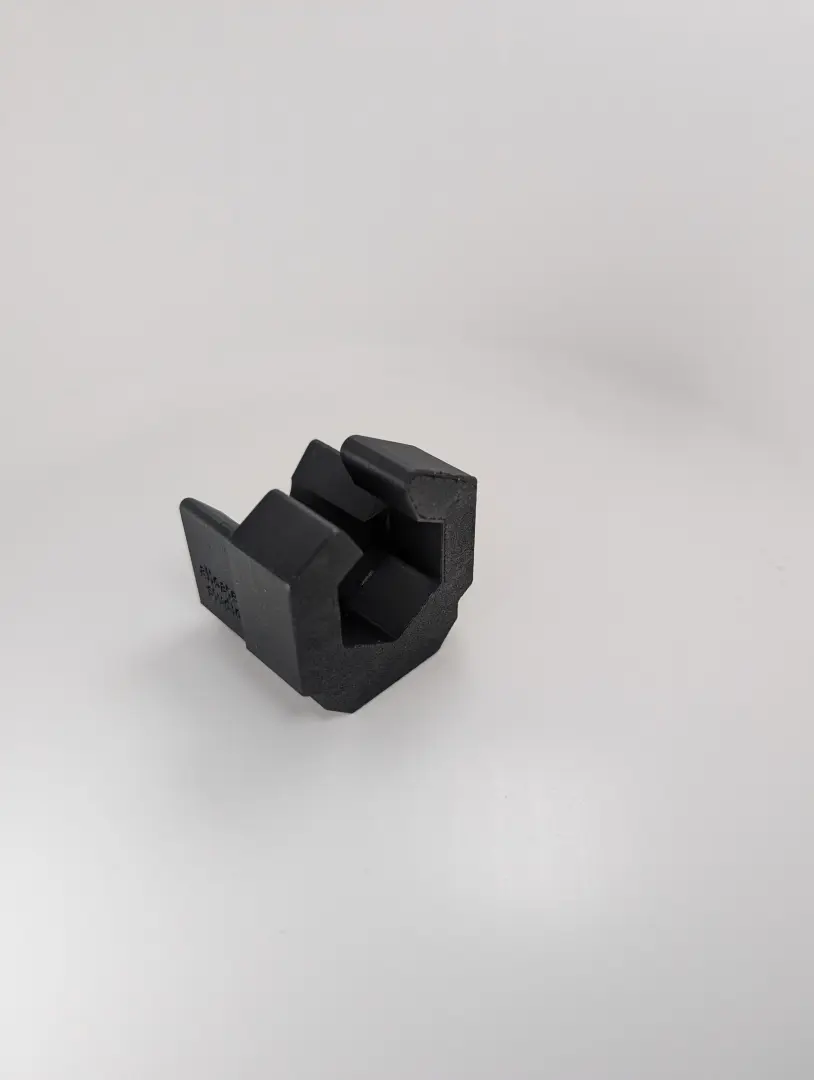
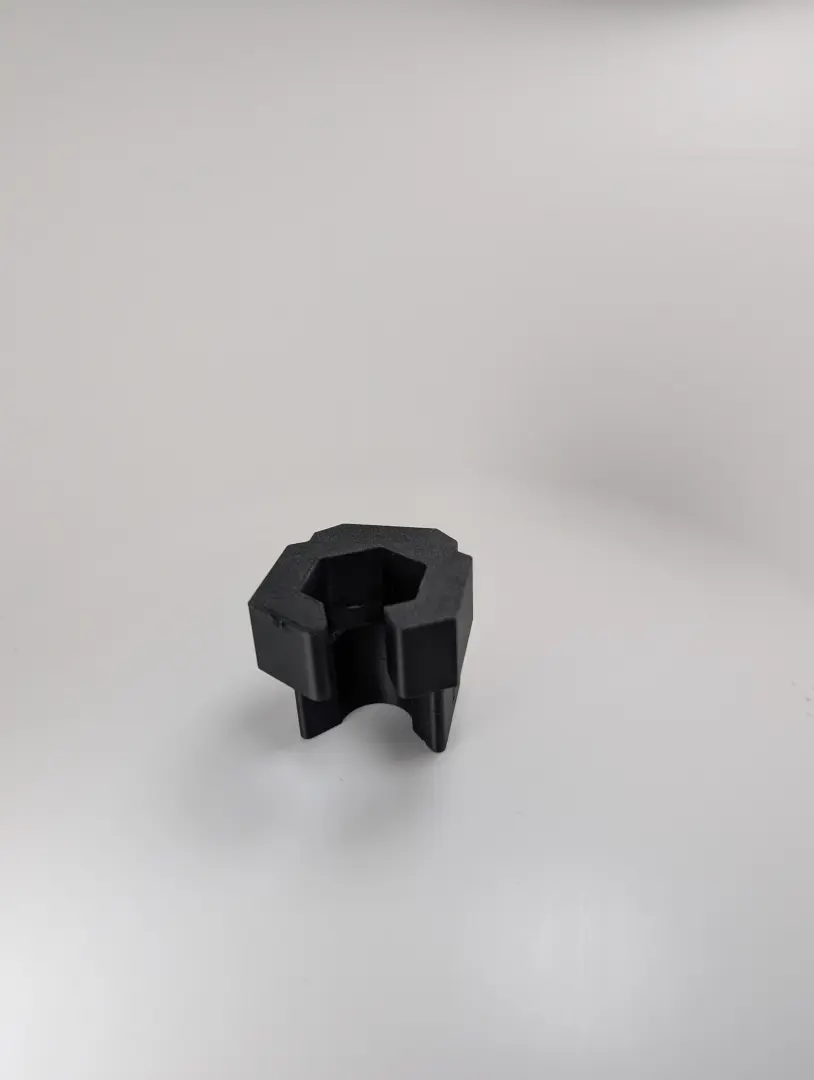
secure the carbsocket to the extension
the carbsocket is designed to secure to the extension just like any other socket. there is a groove inside the pocket to allow the ball bearing on the extension to secure itself inside the carbsocket.
choose the proper socket extension(s)
the aarke pro's tower is about 14 inches deep. the newer CarbSocket is shorter to accommodate smaller tr21-4 hex heads, so you'll need a slightly longer extension to reach the connector inside the tower. the absolute minimum extension length is about 14 inches, though longer ones will offer better maneuverability. you can easily daisy-chain multiple 3/8" extensions together; for instance, a 10-inch and a 6-inch extension combined with a ratchet worked perfectly for me.
-
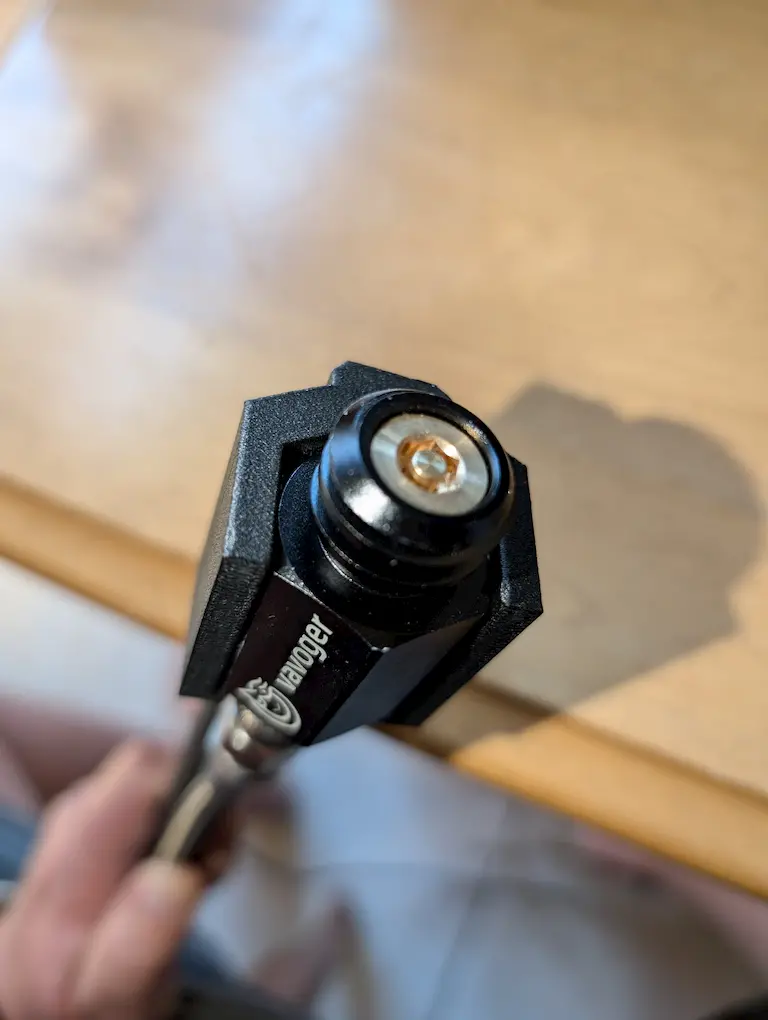
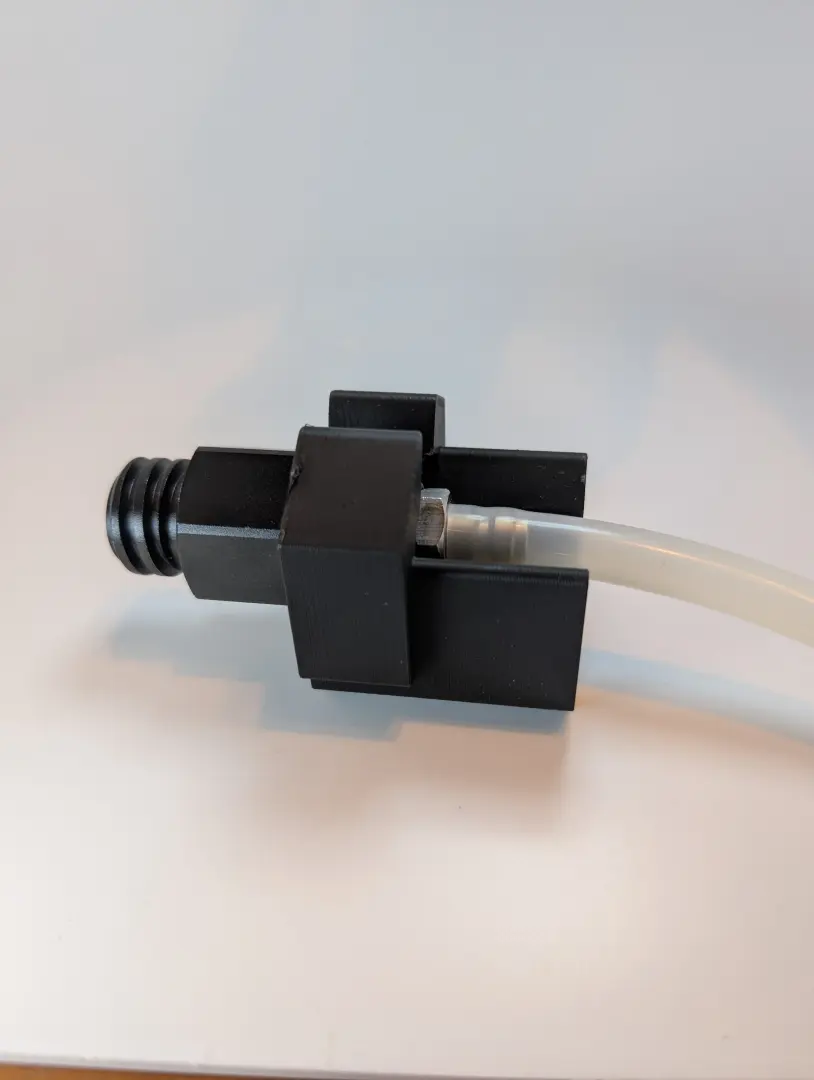
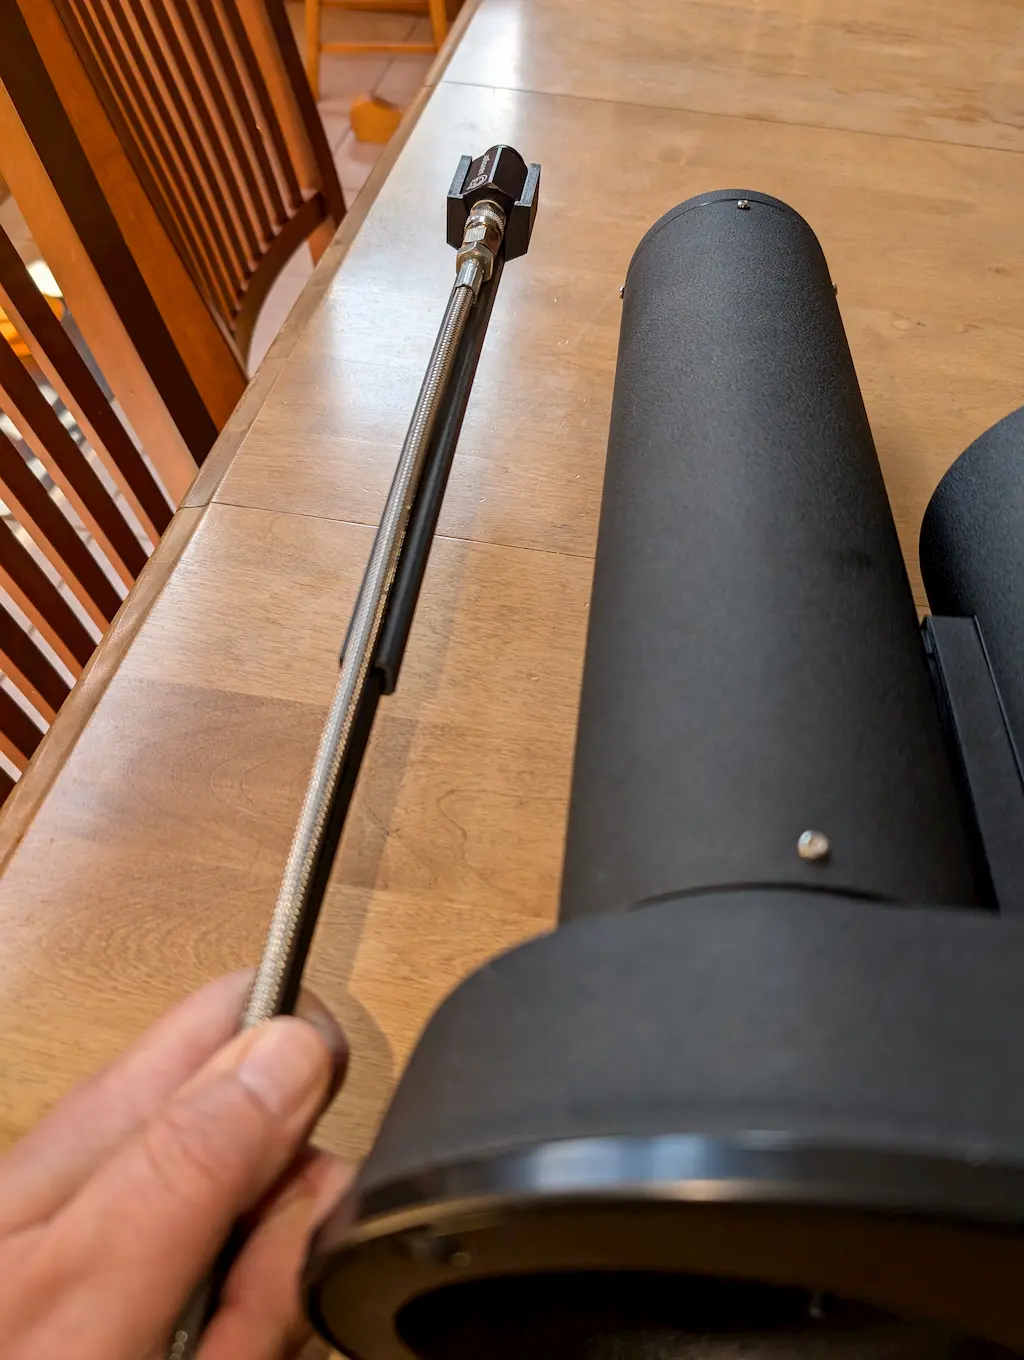
insert tr21-4 adapter into the carbsocket
with the hose attached to the tr21-4 simply feed the hose through the CarbSocket with the other end of the hose towards the ratchet and the threads of the tr21-4 towards the top of the CarbSocket
align the tr21-4 connector with the CarbSocket's opening then
proper insertion of tr21-4 adapter into the CarbSocket
the CarbSocket allows you to connect and disconnect the hose adapter's tr21-4 connector to the carbonator while the hose remains attached.(1)
- this is a key design feature of the CarbSocket. a normal socket could attach to the carbonator's inner connector, but the hose couldn't be attached afterward. the CarbSocket's slot opening allows the hose to be inserted and removed while still connected to the tr21-4 connector.
keep the tr21-4 connector's threads exposed
the CarbSocket is designed to prevent the tr21-4 connector from sliding through, ensuring the threads remain exposed. it also provides a pocket for the hose to flex within the extension.
-
prep the carbonator and tooling
lay your carbonator on a towel on the counter top on its side with the bottom opening facing towards you.
use a flashlight in one hand (or a back ceiling light) and the ratchet and a slight tug on the hose in the other hand.
get some extra hands if you need it
there are plenty of moving parts here. after dozens of tests the process has almost become second nature to me but early on it was a group effort.
-
connect the tr21-4 connector to the carbonator
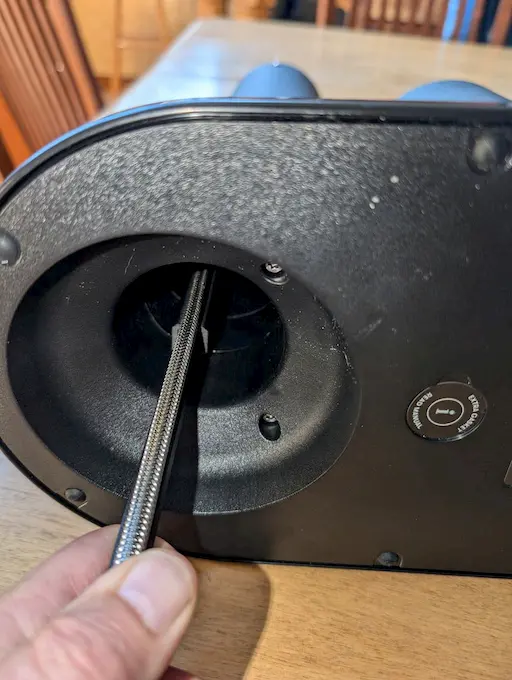
guide the tr21-4 adapter to the mouth of the female adapter way up in the tower of the carbonator until you feel it align the opening. to ensure a secure connection, align the two connectors carefully. make sure the threads are properly engaged before tightening.
gently rotate the ratchet until you feel it get snug and then rotate just a tiny bit more to properly secure the tr21-4 connector to the carbonator connector.
remember lefty-loosie, righty-tighty
adjust the socket ratchet so it applies clockwise (tighten) or counter-clockwise (loosen) force depending on your needs. check it before you start to
let the hose spin and coil as you connect or disconnect
these adapter hoses sure do like to coil up while you are threading connectors. you can fix that later. focus on getting the connectors properly aligned and secured.
-
additional installation instructions & tips
as you probably know, the other side of the hose has a (usually) bronze fitting that attaches to the tank.
attach the connector to the tank first
the hose will coil up a bunch as you tighten as it may not 'slip' or rotate freely as you tighten the connector. other hose adapters may. ensure that the release valve is closed and that all of the threads/fittings on that side of the hose are "snug tight" using a crescent wrench.
is your hose coiling?
if you run into hose coiling issues you can:
-
reverse pre-coil the hose in the opposite direction before attaching
-
spin the co2 tank itself to uncoil the hose. it took me a bit but I eventually got it down.
check out the new CarbLift series (aarke carbonator pro & carbonator 3 versions)
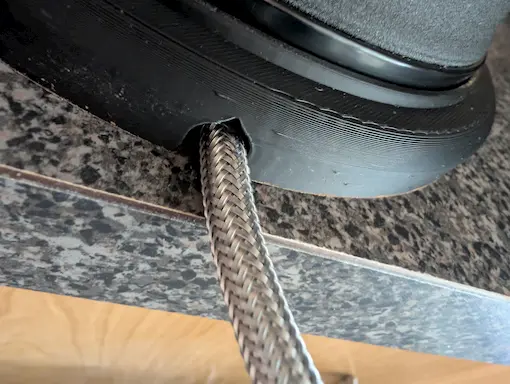
before
after this is the exact issue that inspired the creation of the CarbLift by alloatech studios. the CarbLift elevates your carbonator and gives it a secure surface to rest all while providing ample space for the CO2 hose to connect through the access hole without bending or kinking the hose. this not only ensures a secure and efficient connection but also enhances the overall stability and aesthetics of your setup. say goodbye to workaround stands and hello to a sleek, functional carbonation station with CarbLift.
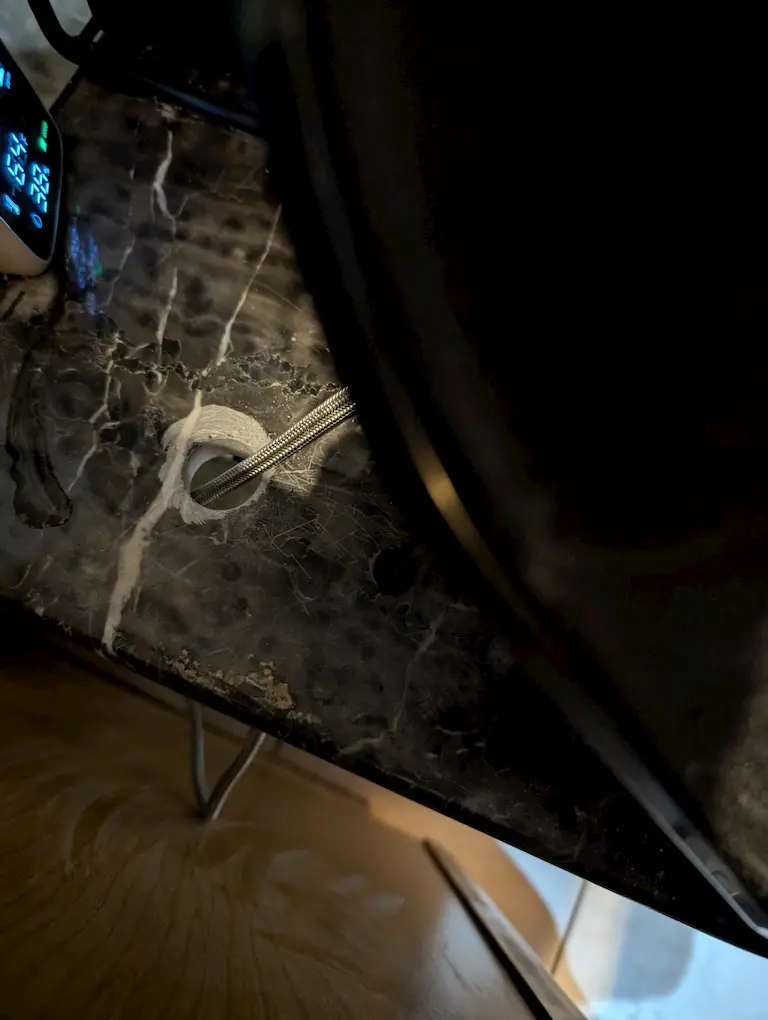
 drill through your counter top
 use a 1" diamond hole saw since the drink station(1) countertop was a non-wood, resin material, making it easy to drill through(2). if you're lucky enough to have this setup, you won't need a CarbLift and can keep your hose hidden(3).
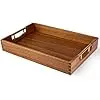
customer idea - wooden serving tray
one of my customers bought a little raised serving tray and placed the whole unit on top. if you buy a rectangle one with a flush top you can turn it upside down and easily drill access holes through the back and now top to feed the connector and hose through. if it is big enough you can store flavorings, bottle and accessories on it to make it a proper station.(1)
- something like this one might work just fine
last resort
you could consider drilling a hole in the back of the aarke pro which I would have done but didn't have to. actually, i may not have drilled a hole in it as the carbonator has a inner wall and who knows what is inside there. could be important. beware.
-